What Is Time Blending?
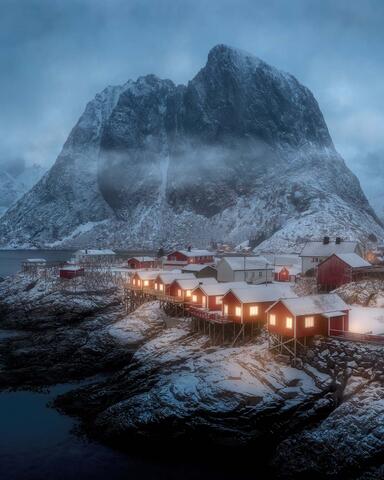
I am just coming back from a short trip to the North East of the United States of America…more specifically New York and Pennsylvania. I had a chance to not only meet many wonderful people I had been chatting with on Instagram for years…I also had a chance to photograph the fall season colours at many locations I had never seen. Of those locations, I wanted to see Buttermilk State Park, Havana Glen, Watkins Glen, Ricketts Glens and many more.
Now since the fall season is a very busy season for a lot of those locations, it’s also fair to say that some scenes were extremely difficult to capture « free-of-humans »… In some situations, all that was required was a bit of patience until people moved out of my composition. In other situations, it was impossible to have a clean image…but what should we do in such circumstances? Not shooting those said scenes and walk away wasn’t my option.
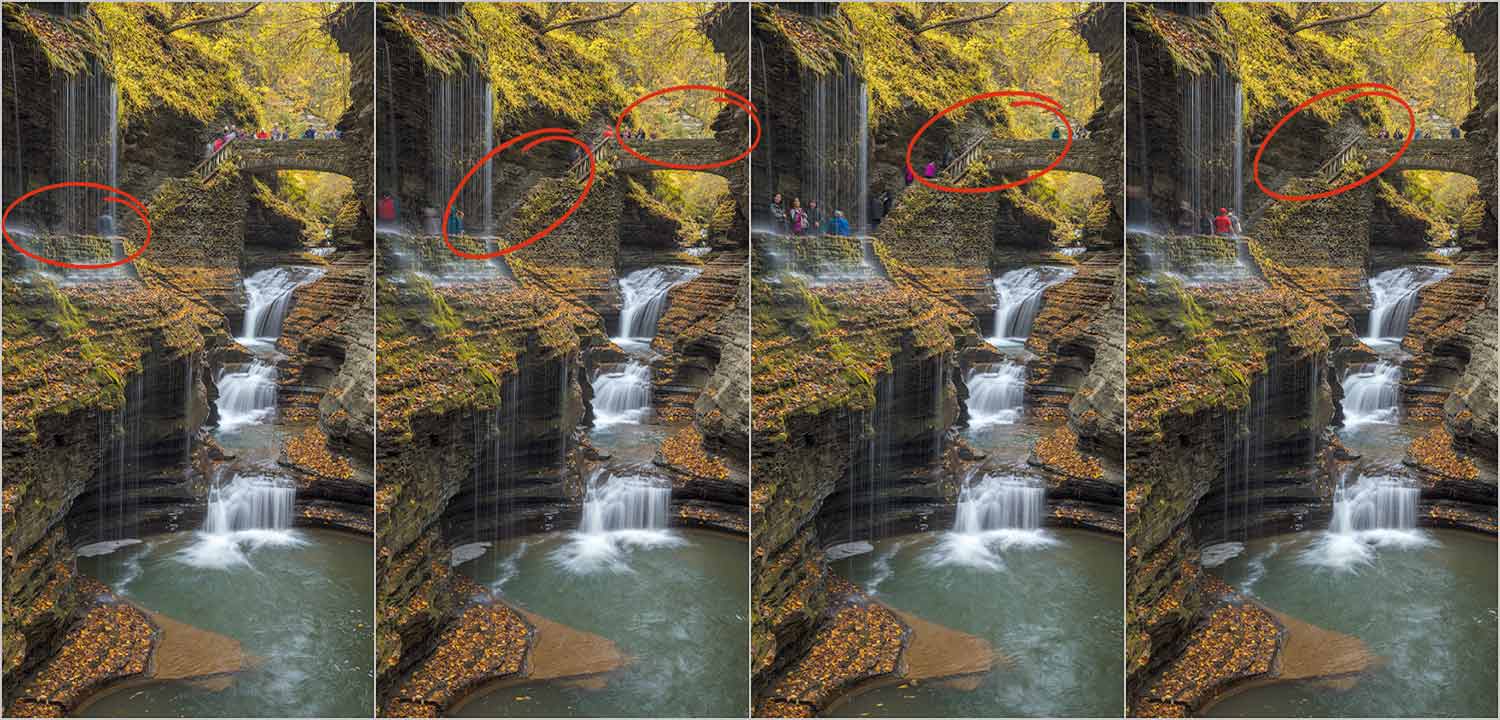
I had highlight locations such as Rainbow Falls in Watkins Glen…people were constantly walking in the frame, bumping into me. Then when they were out of the frame, I had more people coming in. Don’t get me wrong…people are more than allowed to be there to enjoy those said scenes. To add a bit more spiciness to my overall experience, water dripping on me from the cliff…I was getting wet and so was my camera equipment. Patience was seriously getting to a record low!
WHAT CAN I DO TO GET RID OF THEM?
What you could do to get rid of those people is to set up your camera on a tripod…yes, you will need a tripod for this technique. Make sure you are happy with your composition and capture some images as people are moving in and out! In the end, if you are patient enough, you should be able to capture every portion of your image free of people.
AND THEN WHAT'S NEXT?
When you are back home, make sure to back up your images as you normally do and process them in your preferred RAW treatment software. Make sure you synchronize your RAW files so they look basically the same… The next step will be to import all those images as layers into Photoshop. Choose all images in Lightroom, right click and choose to Open As Layers in Photoshop. Once all layers are opened in Photoshop, mask which ever part of each layer you need to create a « free-of-people » final image.

ANY OTHER SITUATIONS WHEN I CAN USE TIME BLENDING?
Yes of course! That technique is extremely useful in many situations! Imagine a situation when you have that perfect sunset in front of your eyes…but the sky has one empty hole with no clouds. Simply wait until the clouds move a bit and capture a few extra frames to fill that empty spot!

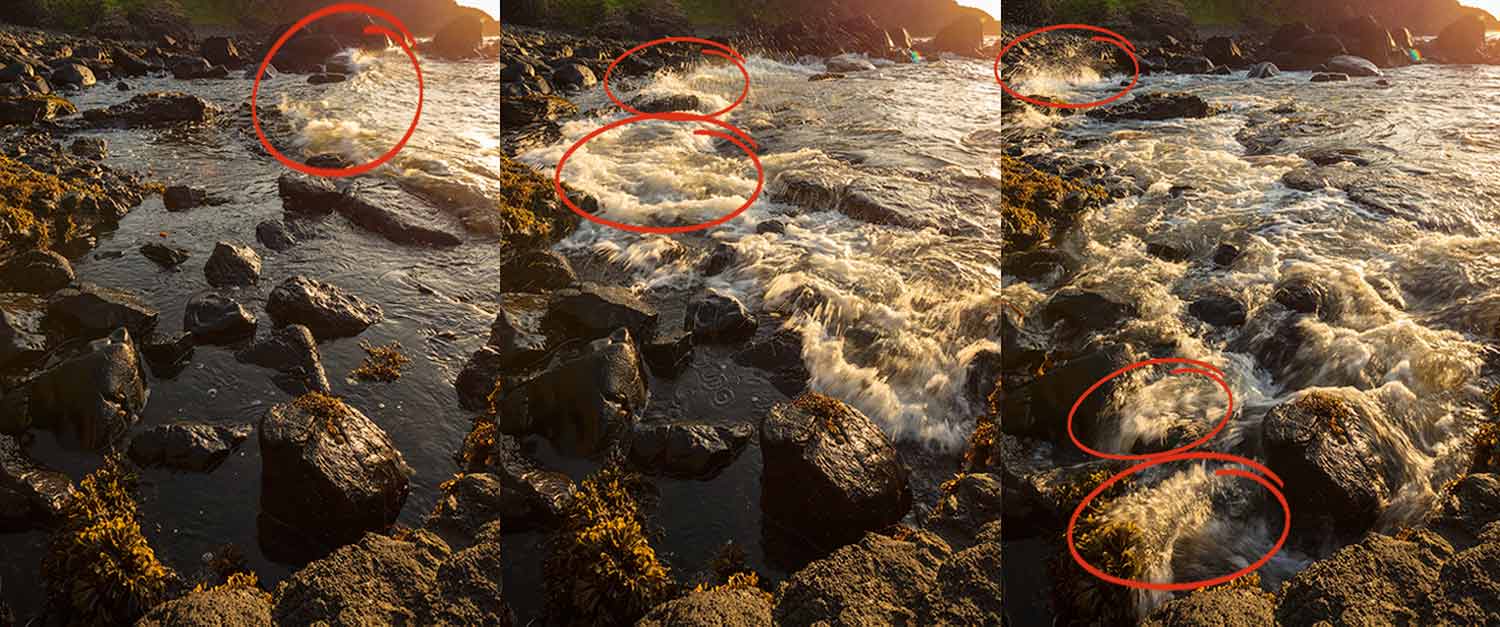
TIME BLENDING FOR SEASCAPE PHOTOGRAPHY
Seascape Photography is difficult…difficult in the sense that it’s very unlikely that you will have synchronized waves hitting every rock at the same time. Time Blending will give you the option to capture waves crashing on different rocks at slightly different moments and later blend them manually with the help of Photoshop.
...IN CONCLUSION.
When ever you have imagination, Time Blending can be of monumental use in sketchy situations. Some purist photographers are against Time Blending as they say the final outcome isn’t from one single image straight out of the camera. Isn’t Photography Art? As far as I am concerned, as long as I create every little bit on my images, I am ok with some sort of Photoshop manipulation. I will not be shy to use such techniques in order to give myself full creative power over the final outcome of my Art.
Would you like to learn more in field techniques? Do you know how to do Focus Stacking? I have a whole article dedicated to that subject! Click here to see The Art of Focus Stacking!