Perfect Optical Filters?
As a landscape photographer, it is obvious that we will need tools to improve our creativity… We will need a special baby tripod to capture images in precarious positions…we will need a wireless remote shutter release for those situations when we want to be creative with selfies…
And we will also need optical filters for those situations when we want to have better control over camera settings such as shutter speed or have better control over reflective surfaces. I don’t know about you specifically but if I was new to landscape photography and I wanted to purchase optical filters, which one should I buy? There are so many different brands and options on the market.
There are a few things I highly recommend when buying optical filters: Do not buy the cheapest possible option! Buy good quality optical filters from a renowned company, look at reviews on the internet and buy from a trustable source. There are also a lot of counterfeit filters on the market. Yup! Some people also decided to copy filters and sell them as high quality ones.
KASE KW REVOLUTION FILTERS
I was contacted by Kase Filters and they asked me if I wanted to do a collaboration. After exchanging emails back and forth, we came to an agreement and I had an opportunity to try their newer line of KW Revolution Magnetic Filters. And since I didn’t have standard sized 82mm round filters for my lenses, I was really looking forward to giving them a try! You can find more information about KASE FILTERS HERE! The lens I use most is a Canon 11-24mm f4.0 and this bad boy requires 186mm filters… All my other lenses require normally sized filters.
Why magnetic you may ask? Well, over the years, I have often struggled with screwing a filter onto my lenses and since the nature of landscape photography involves us capturing images in very precarious positions, I have dropped/lost/broke countless amounts of filters.
With Kase filters, you will initially screw a magnetic inlaid ring onto your lens and after that, all you have to do is snap any filter onto that said lens! You can stack them and since they are very thin, there is a minimal amount of vignette on my Canon RF 15-35mm f2.8 even at 15mm. And it’s all gone at 15,5mm so very manageable. The best part is the struggle to screw a filter on is finally gone!
Another innovative feature of Kase Filters is their colour coding system…each filter has its own specific colour ring which allows us to easily and quickly identify which filter is which. I don’t know about you but I am getting older and reading those fine prints on the filter rings is getting more and more difficult! I will soon need a magnifying glass!
The quality of their filters is second to none! Premium quality optical glass, minimal colour cast, easy to clean and very durable. That’s one thing you want for your expensive camera lens! We pay thousands of dollars for lenses…why would we mount a cheap 20$ filter on it and degrade the image quality? We love quality images don’t we? We need quality filters!

WHEN USING A NEUTRAL DENSITY FILTER?
In photography, some situations will require you to use a slower shutter speed to achieve the desired result…and then again, that is a very personal opinion. Which shutter speed is the best for flowing water? Which is the best for clouds in movement? You will find the answer that suits your style best.
But I can help you find a good starting point, then you decide which way you want to go. For water in movement such as a small water cascade or waterfall, I like to start anywhere around 1/4 to 1/2 a second. Those shutter speeds will allow me to retain a great amount of detail from moving water. Exposing for 30 seconds will simply kill all detail from moving water and everything will become super soft and milky. Maybe that is the style you are going for? Once again, that is my personal opinion.
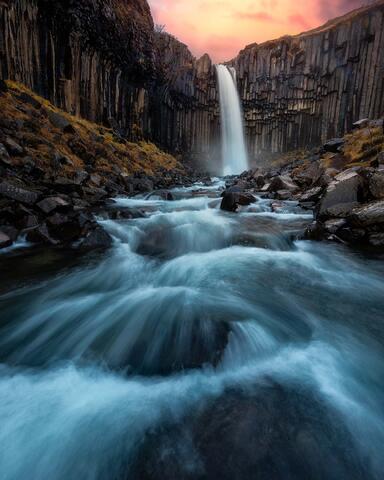
Where the magnetic filters become super handy and practical is when capturing images in situations like this. I was literally standing with both feet in ice cold water, trying to keep a good balance as water was pushing against my legs…precarious describes my position very well here. And instead of adding the struggle of screwing a filter to this already sketchy situation, simply having to effortlessly snap a filter onto the lens makes things so much easier!
See a side by side comparison, with and without filter down below…

BEING CREATIVE WITH A NEUTRAL DENSITY FILTER
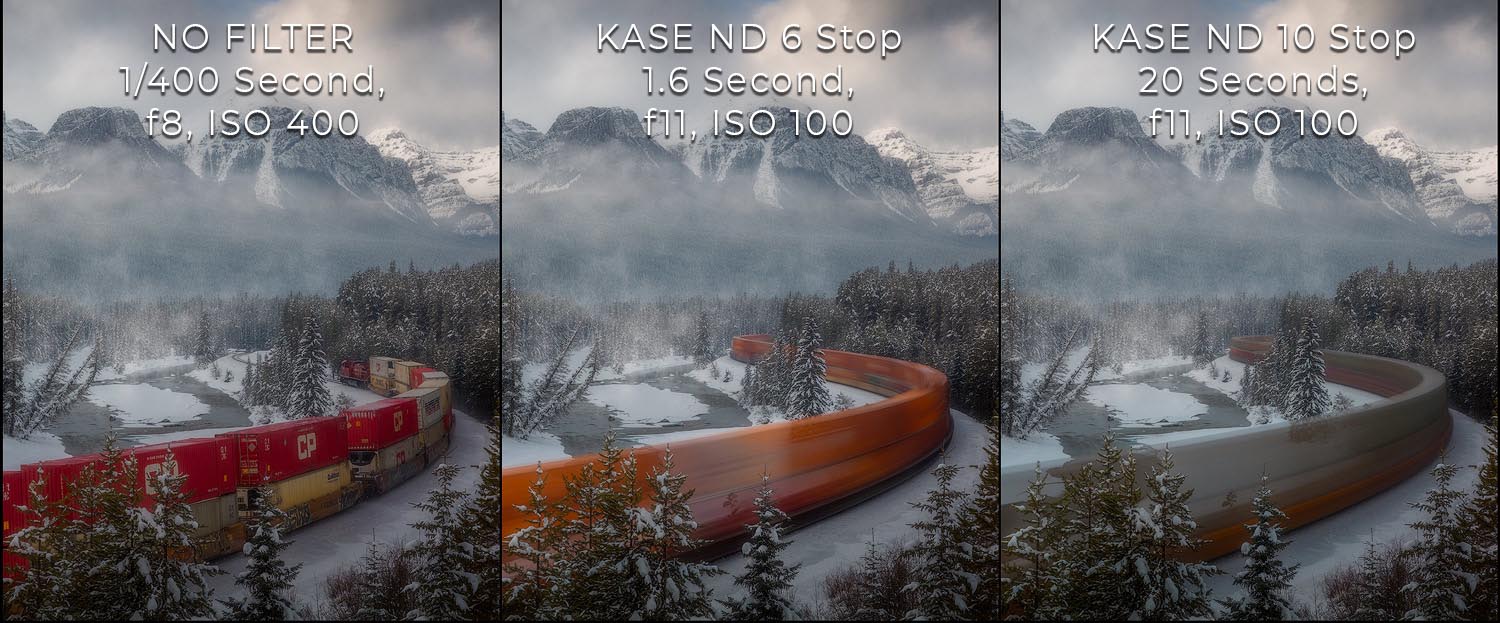
Of the many subjects most people will consider a Neutral Density filter for me would be moving water from a river or a waterfall…how about we use it for a train in movement? On that specific day at Morant’s Curve, I was waiting for a train to go by! Most of the time, you will want to capture it driving to the east as the front of the train will/should have two engines! Two is better than one …right? And the other thing you want is red double stacked containers! They contrast so nicely against a snowy scene. And when it came, it was not only coming from the wrong direction, it also didn’t have an engine at the back…but it had those lovely double stacked bright containers so I knew I wanted to give it a shot with a 10 Stop Neutral Density filter. This allowed me to use a shutter speed of 20 seconds instead of 1/50.
See a side by side example below and let me know which you prefer!
WHY WOULD I USE A CIRCULAR POLARIZER FILTER?
Some surfaces will obviously be reflecting light…water, ice, vegetation, wet rocks, wet pavement…those are just a few examples of surfaces that could be reflecting light. In some situations, you will want to control the amount of light being reflected on those surfaces and you can do so by using a Circular Polarizer Filter. Don’t get me wrong, reflections are often a very cool feature of landscape photography. I love reflections! But some times I find them a little too strong and/or even distracting. By simply mounting a Circular Polarizer Filter on my lens and gently rotating it clockwise or counterclockwise, I will be able to reduce or remove reflection. The example below shows nicely how I removed some reflection in my foreground as the ice was very shiny and was « fighting » with my foreground interest which was the beautiful methane bubbles!

MANY OTHER CREATIVE FILTERS
Keep in mind that Neutral Density and Circular Polarizer aren’t the only two filters you can buy…Kase Filters also offers many other interesting and creative options such as a Night Sky which will greatly help with reducing light pollution, Mist Filters to add some dreamy foggy effects to your images, Infrared Filters which are really fun to use because they make vegetation look white when the images are transferred to Black and White… among many others creative filters. The sky literally is the limit!
…IN CONCLUSION
In conclusion, what you want to remember from this article is to buy quality optical filters from a trustable source. Buying cheap filters will only frustrate you because you will decrease the image quality. Quality filters will last you a lifetime and will open a whole new level of creativity for your landscape photography!
Would you like to read more about long exposure photography, also consider reading my article THE POWER OF LONG EXPOSURE! Enjoy!