
Get Rid of Annoying Lens Flares!
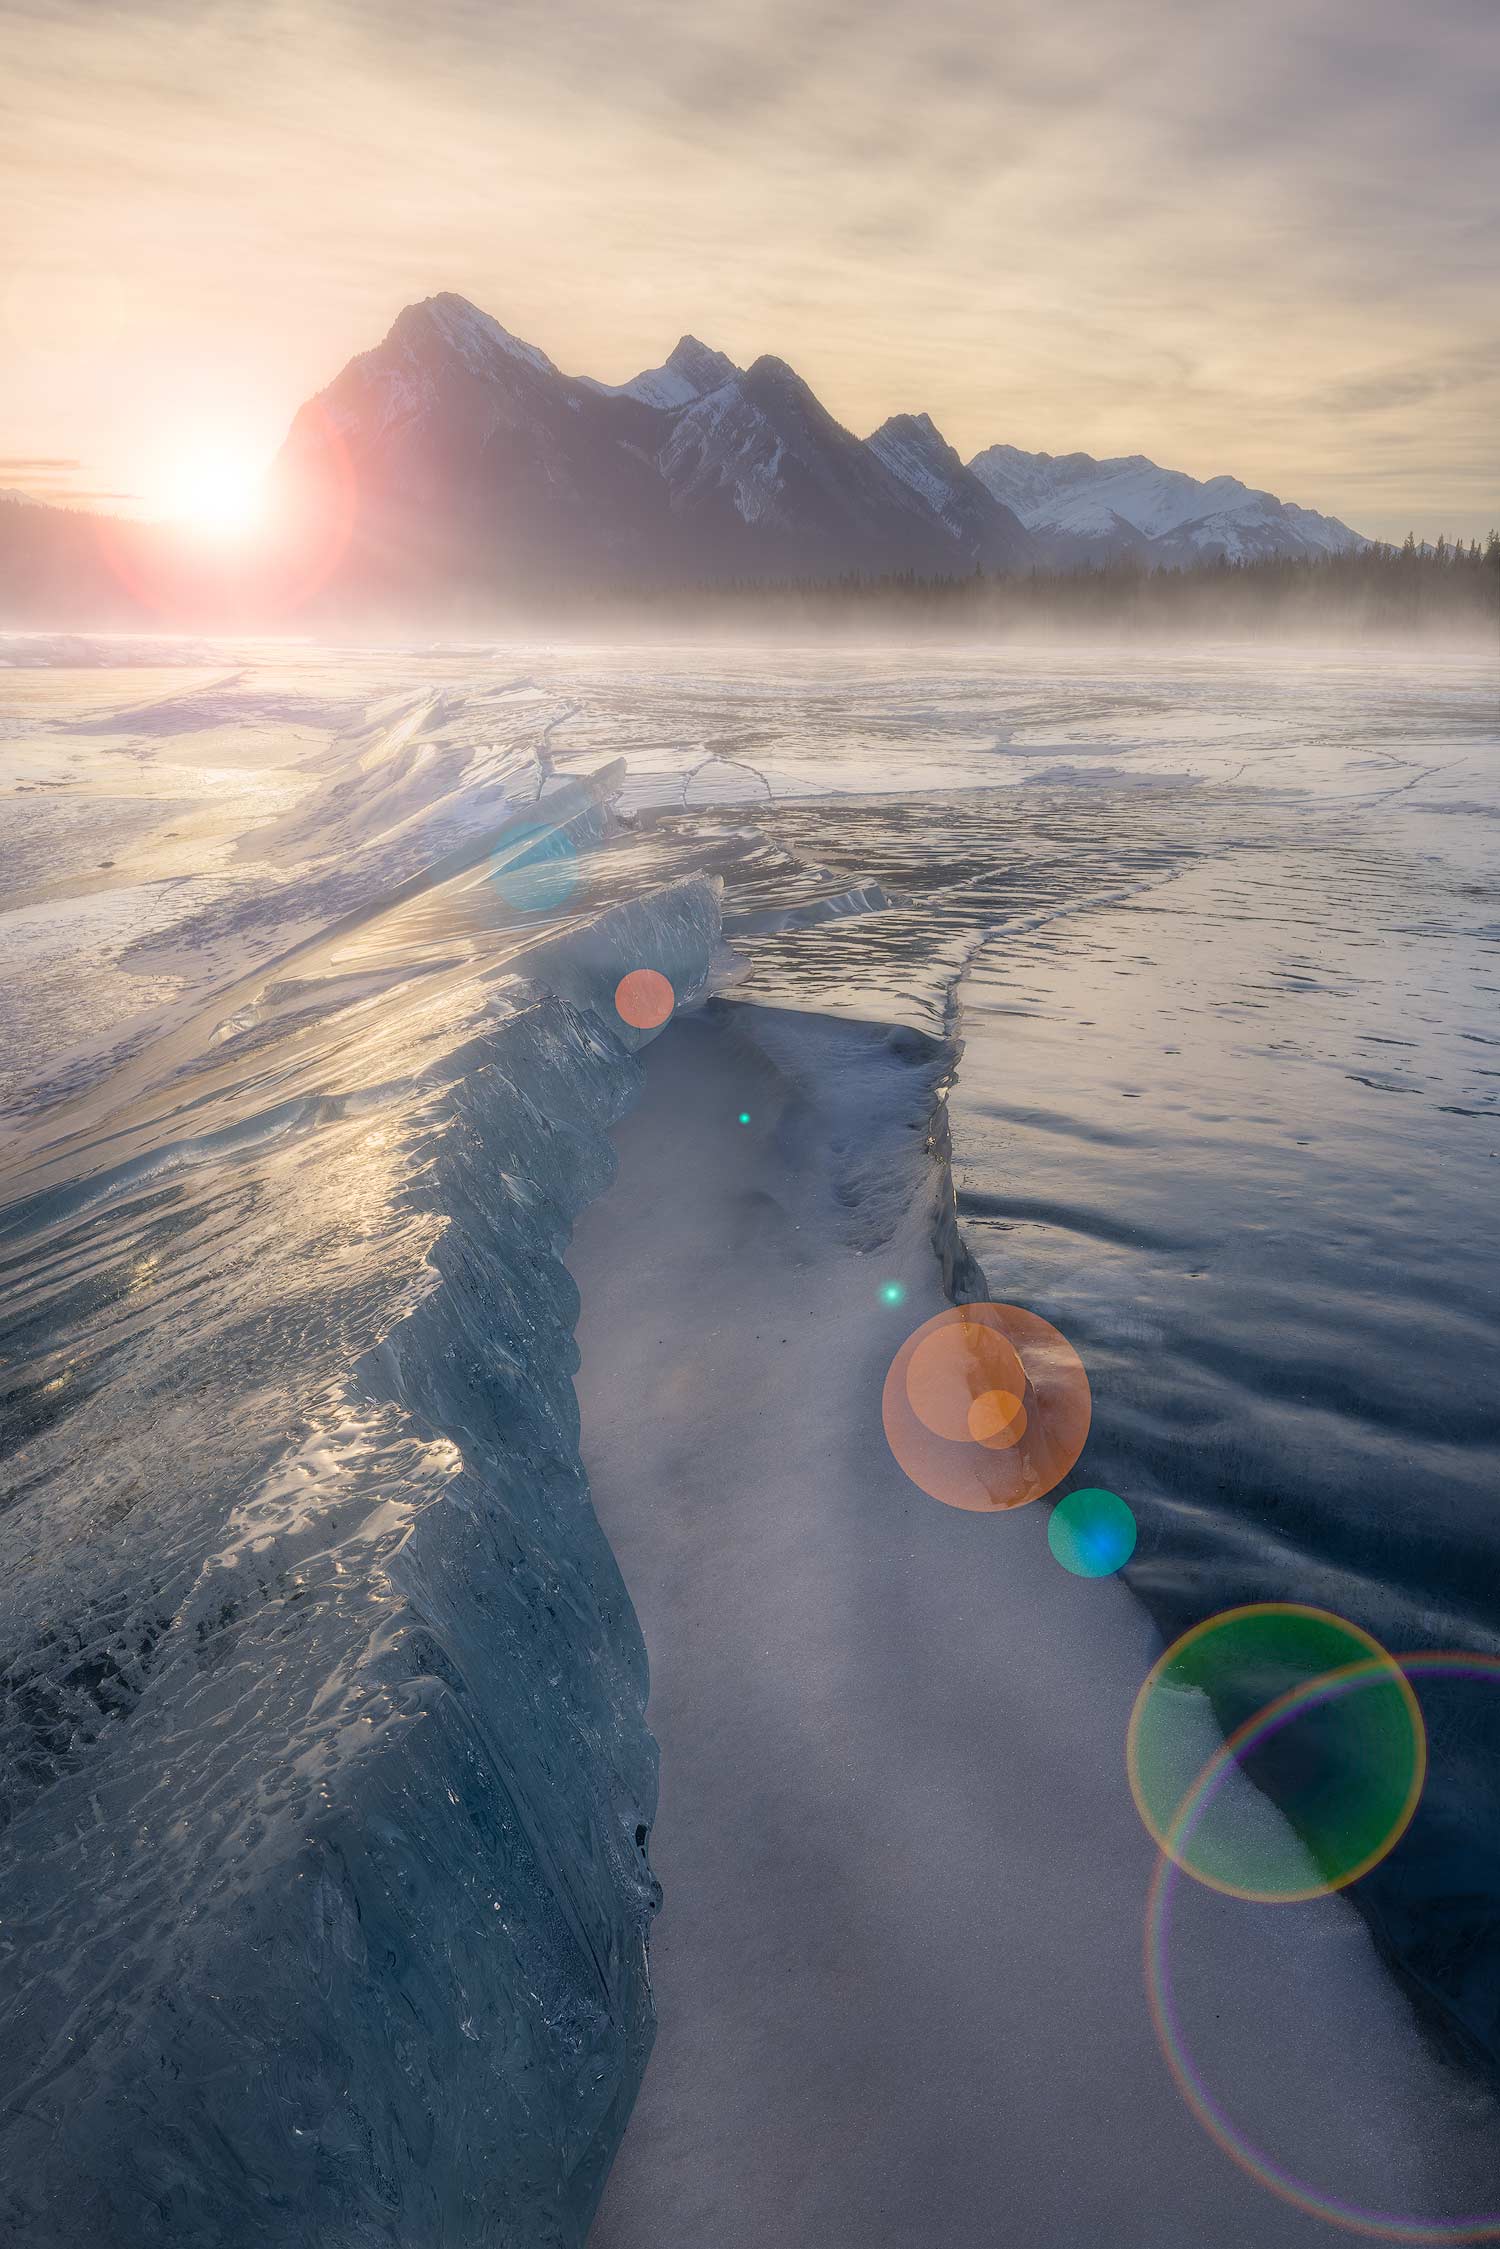
In this article, I will help you to get rid of annoying lens flares. Why? Because they are horrible! They can literally ruin some images. And sometimes you only notice them when you have returned home and are reviewing your images. What a shock to see a multi colored lens flare in the middle of a difficult if not impossible to edit area of the image. It happened to me many times…most of the time, they can be avoided with very simple tricks while in other situations, you have to be a little bit more creative.
Over my many years of photographing nature and landscape images for the most part, I have developed a check list in order to avoid lens flares. Now, what causes lens flares? A lens flare is generally caused when a bright source of light, whether it is natural or artificial, comes into the lens and bounces between different glass elements. In some situations, people like lens flares and would even provoke them by intentionally pointing the lens towards a light source. For portrait or wildlife photography, I must admit that I kind of enjoy a certain amount of creative lens flare. They can add a little something dynamic to the image. For landscape photography on the other hand, I think lens flares should always be a nuisance! I don’t want any.
But how do you avoid them you may ask? Keep reading below and find answers to your questions…
DON’T BE SILLY, USE THE LENS HOOD!
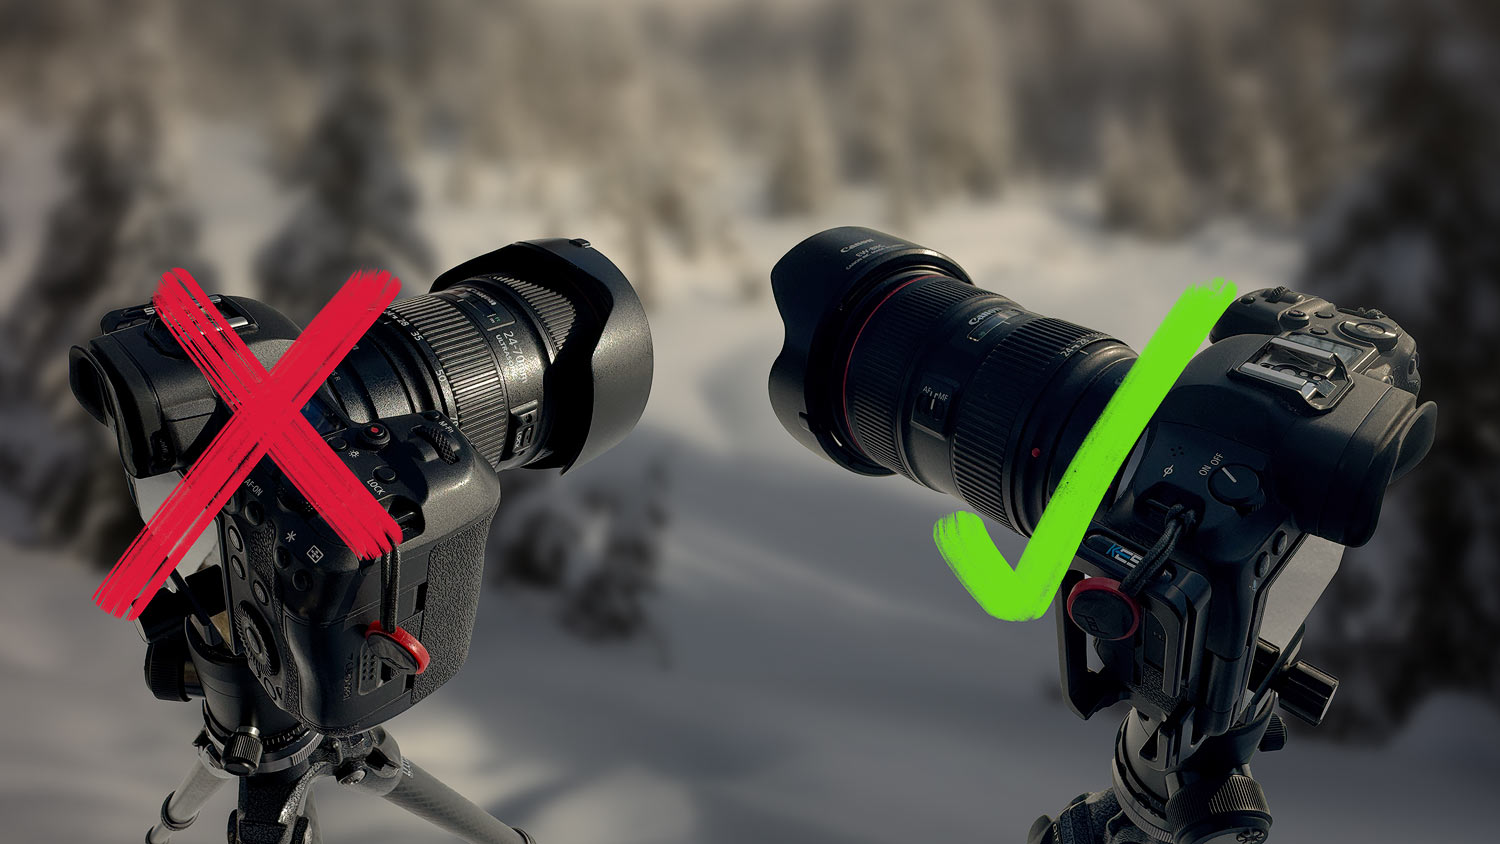
Don’t be silly, use the lens hood correctly! There’s no such thing as leaving the lens hood at home because you don’t like to use them…or worse, are you the kind of person to leave the lens hood upside down? Camera manufacturers spend millions in the conception of lenses and lens hoods. That should be a good enough reason to use it correctly. Of course, if the sun is straight in front of you, the lens hood probably won’t help. But in most situations when the sun is at your side, the lens hood will help with those issues.
And there are many other reasons for using the lens hood correctly…it can shelter your lens’ front element from precipitation or dust. It could also make a huge difference if you accidentally drop the camera. If the camera falls on the lens hood, it’s more likely that it will survive the fall! Don’t be that person that uses his lens hood the wrong way…please!
MASK THE SUN WITH A FINGER

As mentioned earlier, a lens hood won’t always help if the sun is directly in front of you. You can mask the sun with a finger! What do I mean by that? Use a finger to cover the part of the sky where the sun is located in your image.
Photographing against the sun won’t always cause lens flares…but if it does and you happen to see them in your view finder or on your camera’s back screen, this is when you should try to mask the sun with a finger or any other object you might have that will hide the sun. That way, you will surely be getting rid of the undesirable lens flares. Yes, you will have a finger in your image…you can always photograph with and without your finger and blend both images together in Photoshop. This technique will make it much easier to get rid of lens flares.
You don’t like the idea of using your finger? Then you can always use a good old spoon! There is always a solution to every problem…a bit of creativity is what is needed.
TIME FOR TIME BLENDING?
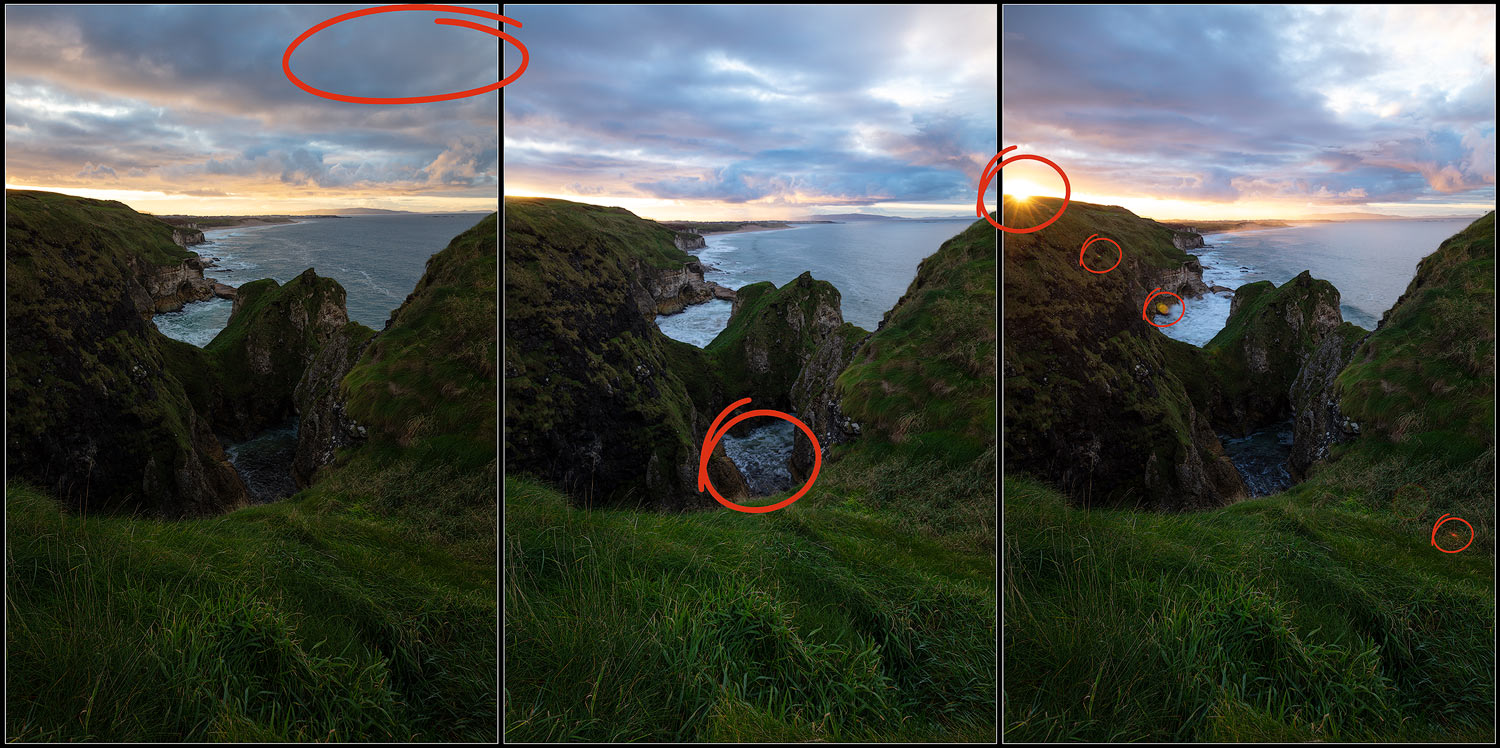
You don’t want to mask the sun with your finger in fear of having issues when assembling everything later in Photoshop? Then maybe it’s time for time blending! I often talk about that technique. It is a fairly simple technique to use when you have a tripod. And for that technique to work, you will need to make sure that the camera is steadily mounted to the tripod and that you won’t move it until you are done capturing the images needed. It could definitely be a great trick if you have a cloudy sky with fast moving clouds and will eventually obstruct the sun and eliminate the flares at the same time. Then when the time comes to blend the images together in Photoshop, it will be as simple as stacking the layers, apply a black mask to the top layer and only unveil the part of the image you want with a white brush.
I use Time Blending for many different reasons…whether it is to get rid of people in the composition or to create the perfect mood. And I have talked about this technique in two previous Blog Articles. Feel free to have a look at both of them. The first article What is Time Blending and the second, Perfect Example of Time Blending are both extremely interesting and could help solve a lot of issues while opening new creative horizons…
KEEPING THE LENS CLEAN
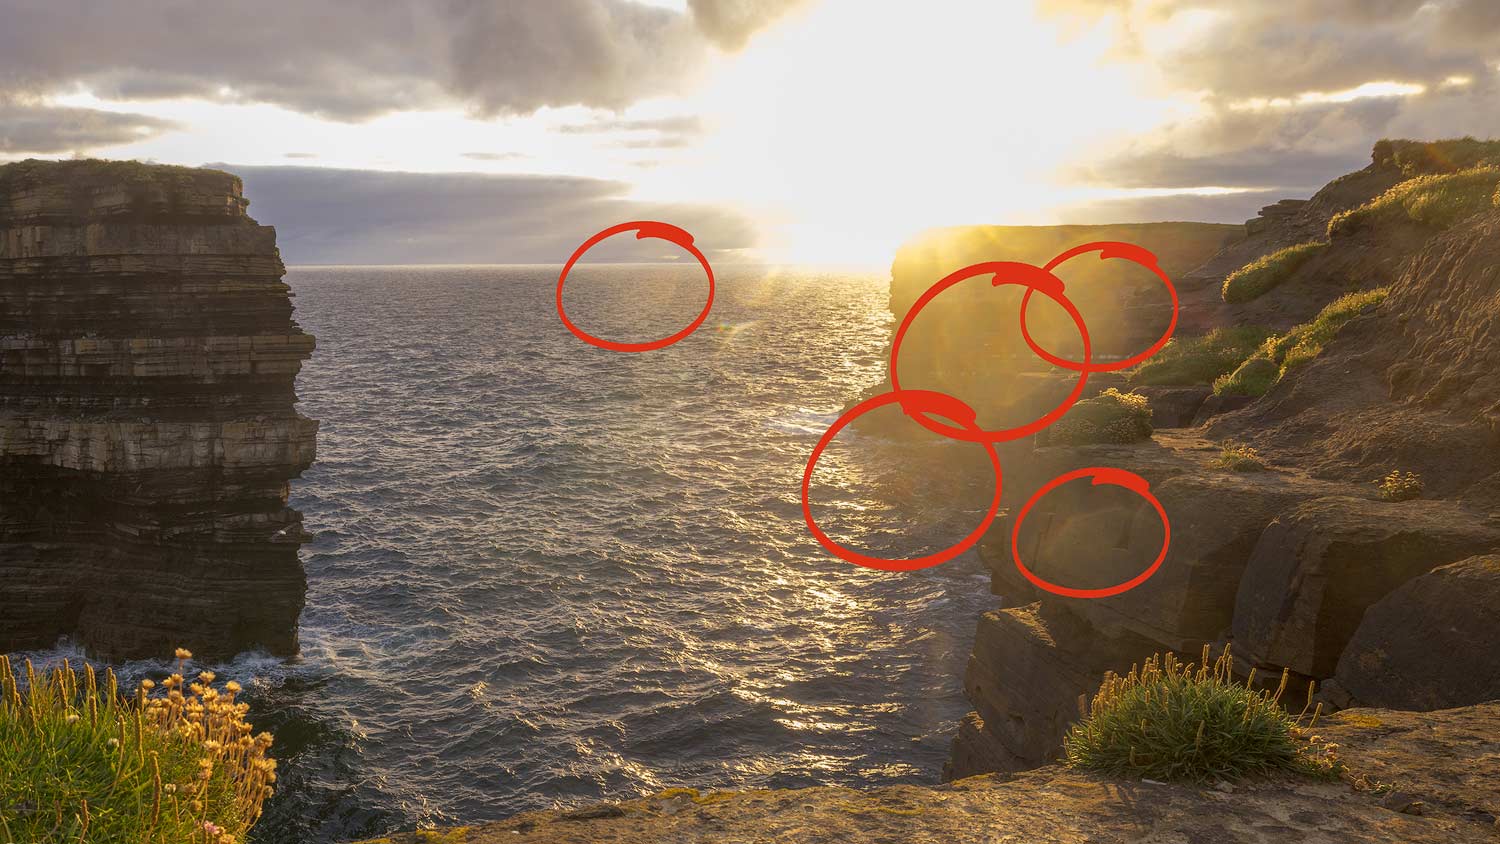
Whether we like it or not, we carry our camera gear outside. It can be dirty or dusty and eventually, that could result in a dirty lens. I have noticed that a dirty lens can be more prone to lens flares. The lens is designed so the light enters more or less in a straight line to eventually meet in the middle of the lens at its Nodal Point. If there are some dirt particles or water smudges on the lens, this could deviate some light and cause some bouncing effect which is the main reason why lens flares exist. By simply cleaning my lenses’ front element carefully, I was often able to get rid of most lens flares when it would normally not be an issue.
One thing to keep in mind when cleaning the lens, do not use your shirt…use a proper microfiber lens clothe. Make sure that the clothe is clean. If you plan on using a liquid to clean your lens, be careful with alcohol based products. Some are specifically designed to clean optical glass. Buy the right products! Zeiss makes lens cleaning kits. I would definitely trust a high end optical glass company like Zeiss for lens cleaning products. These guys make the highest quality glass on the market. Most high end lens manufacturers are coating their lens elements with exotic coatings which could be good for avoiding lens fog or lens flares…using the wrong product could damage those invisible lens coatings.
AVOID USING FILTERS

That statement is probably going to be very contradictory to what I almost always do…avoid using filters! Really? How? Why? Let me explain…I should have been more clear. Avoid using filters when you don’t need one. Especially if it’s a very cheap one. Most lenses will have front elements that have a curved shape. That will often be more evident the wider the lens is. My Canon EF 11-24mm f4.0 has almost a half sphere front element. Then, if you want to use a filter, that filter definitely won’t have the same curve shape as the front element. That’s not going to help with lens flares.
As most of you already know, I lead landscape photography workshops. And I often see customers using protective filters or even UV filters in front of their lenses. And in most situations, these filters are very cheap in price and quality. Not only they will affect the optical performance of the lens, they could very well cause lens flares. Do we really want to use a cheap 45$ filter in front of a 1500$ lens? That doesn’t make sense to me…and it shouldn’t to you either. We don’t need protective filters outside if we are being careful. Don’t use any. Just use quality Neutral Density or Circular Polarizer filters when needed.
DEALING WITH LENS FLARES AFTER THE FACT…
Let’s say you were very careful while photographing and you still didn’t notice that you had some lens flares, how are you dealing with lens flares after the fact? You can always try to get rid of the smaller ones using your preferred RAW editing software. If it’s a very small lens flare, you might be able to clone it out with a couple clicks of the mouse. But sometimes things get a little more complicated. Even though Lightroom has gotten much better over the years, it can struggle to remove artifacts such as lens flares. You’d need to use the big gun then: Photoshop.
I’ll explain how I get rid of them using Photoshop but with a very natural looking result. It requires very basic knowledge of Photoshop. First of all, you will need to open your image in Photoshop. After that, there are a couple of steps but I’ll guide you through each one of them.
The first step is to create two new empty pixel layers. You will need to change the blending mode of both layers in such a way that one will be in Color Blending Mode and the second in Darken Blending Mode. The order in which you arrange the layers doesn’t matter…
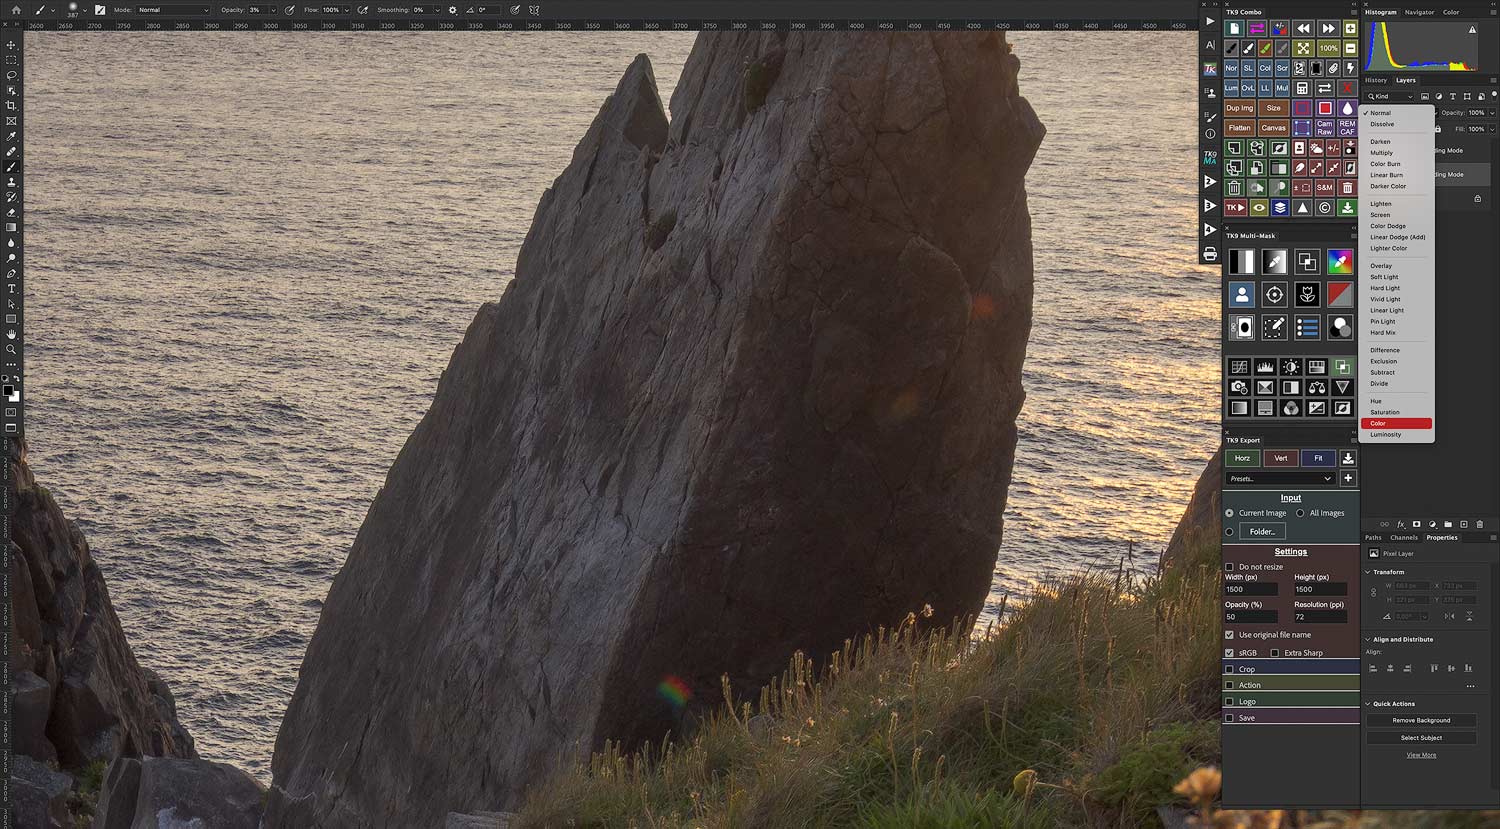
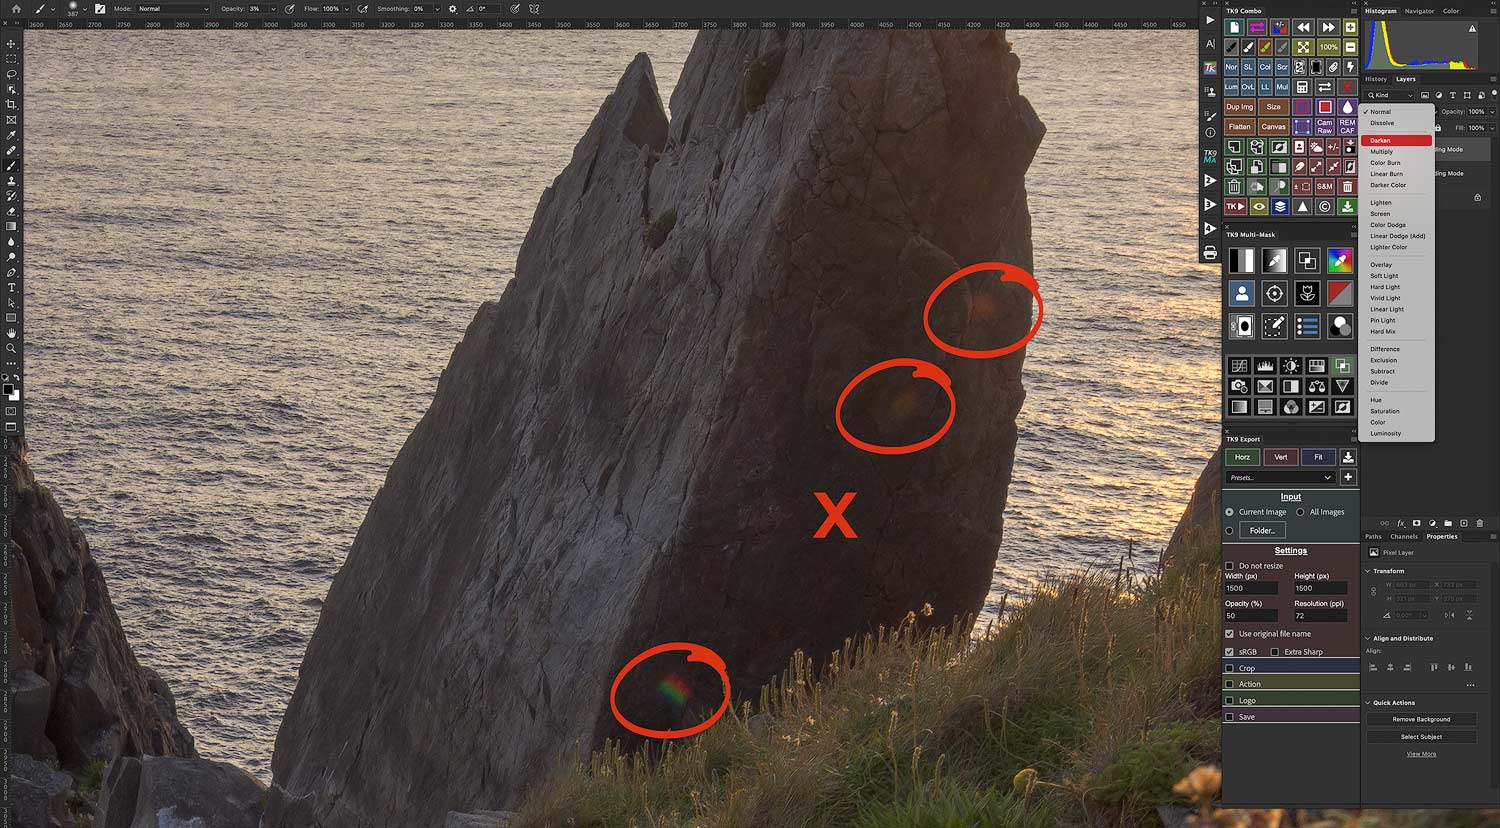
The second step, the layer in Color Blending Mode; you will need to use a brush with very low opacity of around 20%, sample a color near the lens flare but away from the undesirable colors. And after that, you will need to gently brush on the lens flares themselves until you gradually see the multiple colors from the lens flare slowly disappear.
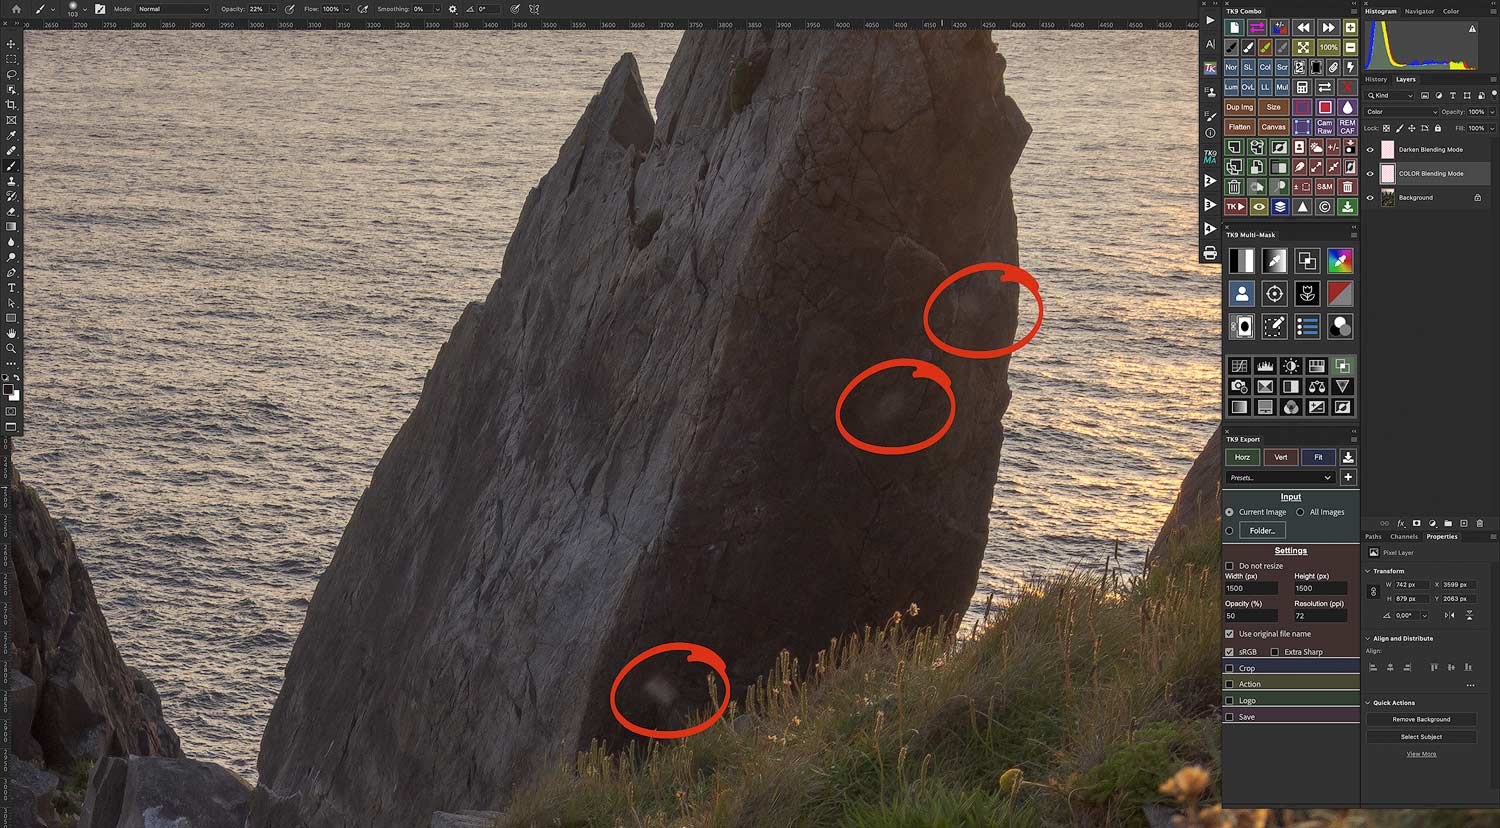
The third step, the layer in Darken Blending Mode; this step might or might not be needed. In most situations, lens flares will introduce colors and brightness in some areas. The previous layer was used to get rid of the undesirable colors from the lens flare. If you feel like the area previously affected by the undesirable colors is also brighter, then use the second layer to correct the area. Use the Clone Tool again at a fairly low opacity of around 10%, sample what you want to clone in a near by area with similar texture and gently introduce these details in the brighter area. Since the layer is in Darken Blending Mode, it should do a good job at making the area slightly darker while retaining the texture.
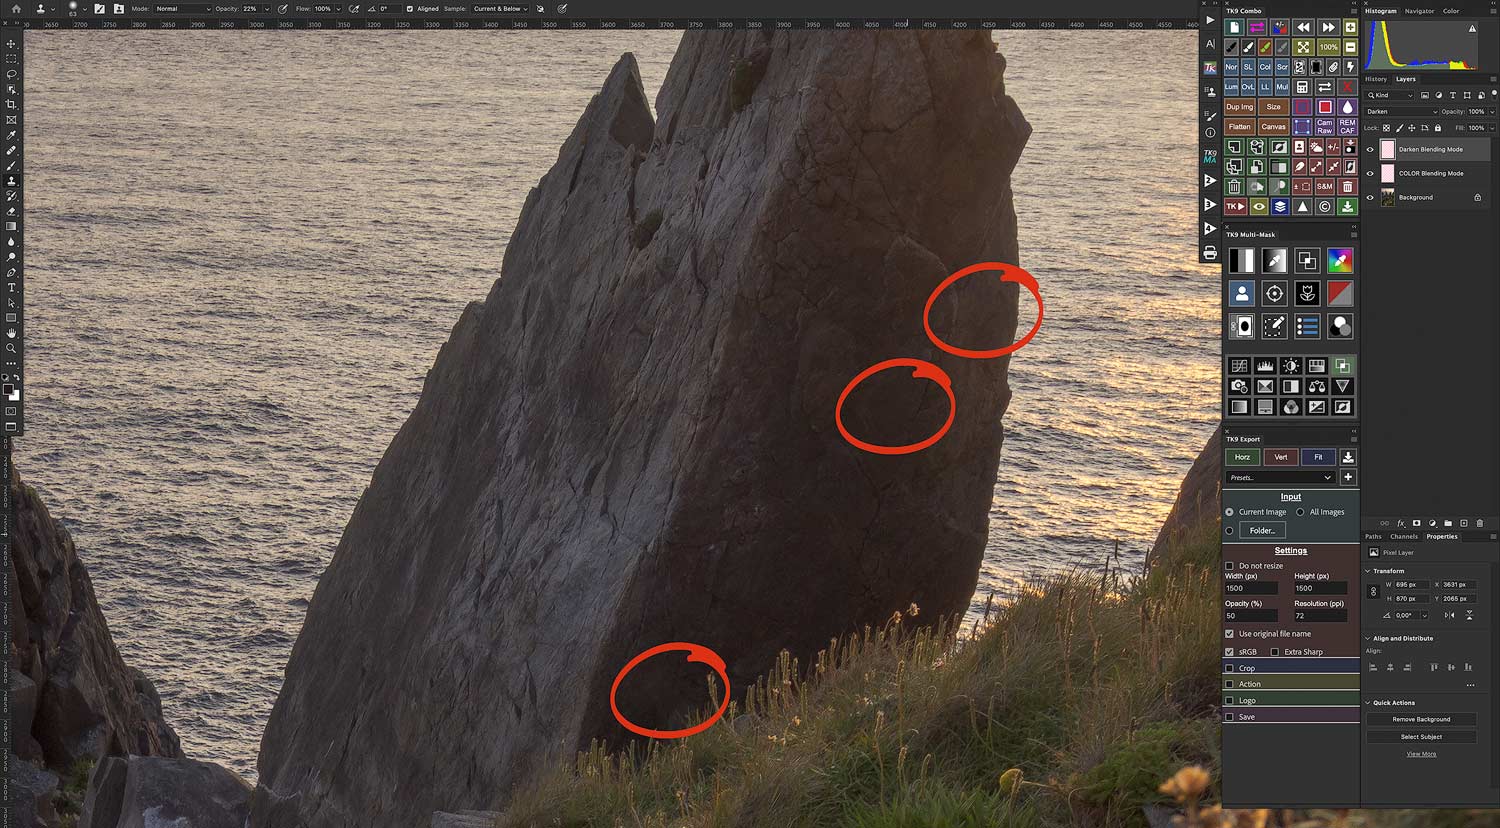
This will probably require a bit of trial and error. You might not be 100% satisfied on your first attempt. Remember that you can always start over again or even add an extra layer in either blending modes previously mentioned. Once you are happy with the result, go on with your adjustments and other corrections and don’t forget to save your canvas! Oh and you will be able to see what this image looks like once edited...it will be at the bottom of the article.
…IN CONCLUSION
In conclusion, there is always a solution to every problem. And I am very good at finding solutions. That’s probably because I come from a car mechanic background and my job was literally to diagnose complicated electrical problems. I see every problem as a different challenge and I love them all!
I know some would probably say that the best way to avoid lens flares could also be to avoid shooting against the sun…even though that option is an extremely viable one, it can sometimes be fun and rewarding to actually shoot against the sun. If the sun catches some atmosphere or vegetation in a scene, it will surely add life to the final image. Dawn or dusk light can be super easy to work with but could potentially lack a bit of contrast. The sun will add that missing something.
You simply need to remember to pay attention to the direction of the sun when you are shooting. If the sun has a direct line with the lens’ front element, it could create lens flares. When I am done capturing a specific scene, I will make sure to carefully look at my images just to ensure there is no or very little lens flare. And if I do notice lens flares, I will make sure to have a plan B to allow myself to easily remove it from my images. I know it can be difficult while the light is at its best…I’ve been there too, I rushed myself more often than I can remember and had a few disappointments when returning home and realizing that I made an unrepairable mistake.
